This is a brief overview of how to use Mission Planner. It’s based on my limited experience with drones running the ArduPilot firmware.
I am by no means an authority on either of these topics, but since there seems to be a dearth of documentation out there on Mission Planner, maybe this will be useful to you.
Below, I will often refer to Mission Planner as “MP”, for brevity.
Make sure your radio hardware is set up properly. Obviously Mission Planner can’t talk to the drone if there’s no radio connection to the drone.
This part is generally outside the scope of this tutorial (and even further outside my area of expertise), but here’s a very brief overview.
Most of the time the radio connection between your GCS (Ground Control Station, i.e. a latop running Mission Planner) and your drone is going to be either a 900Mhz “telemetry radio” or WiFi.
Non-WiFi radios in the drone world seem to be called “telemetry radios”.
My guess is that this is inherited from the RC plane world. The original RC controller handsets transmitted analog signals that were received and converted into motor speeds. My guess is that, initially at least, digital radios were probably used primarily for non-control purposes, ie. for getting sensor readings, etc. Hence “telemetry radio”. Apparently the name stuck, even though “telemetry radios” are also used to control the drones, these days.
Humans are a contradiction, lazy and sloppy with language while simultaneously demanding firm, unchanging definitions and neat, clean categories.
Not all telemetry radios are 900Mhz, but 900Mhz seems to be most popular (in the US, at least).
There are also non-WiFi radios that provide a digital connection, usually presenting to the hardware as TCP/IP, but not using the WiFi radio protocols and frequencies. Some of them are 900Mhz, some of them are even weirder. Some of those non-WiFi digital radios also provide other features, like meshing (one example of that is the Doodle Labs radios).
Telemetry radios seem very often be designed to look like a serial port on either end. As far as the software is concerned, you have one extremely long serial cable, plugged into the GCS hardware’s serial port on one end and the flight controller’s serial port on the other end. In reality, it’s two “paired” radios, each with a serial port that the hardware on either end plugs into.
Usually the laptop end uses serial-over-USB, because there aren’t a lot of laptops with physical serial ports.
The process for “pairing” the radios is specific to the brand and model of radios involved.
Almost all of my experience with drone radios has been with WiFi.
The most popular approach to WiFi in the drone world seems to be having the drone act as the WiFi AP, and the GCS or handset act as the WiFi client, connecting to the drone’s WiFi AP. Check your hardware documentation for more information.
Very often the weak link is the GCS’s WiFi hardware signal strength. Presumably the drone’s wifi hardware is designed for this role and is stronger, but laptop WiFi hardware is not. I’ve sometimes found it useful to have separate WiFi AP hardware that acts as the base station. Bullet routers, for example, typically have much, much better signal strength than laptop or tablet wifi radios.
MissionPlanner is a .net application and is primarily supported on Windows.
Mission Planner is not supported on OSX, but there’s some group of devs who are not part of the ArduPilot project, who are working on MP on MacOS, and have betas out. However, it appears to be a bit limited, so far.
It’s possible to run Mission Planner on Linux, using the Mono port of .net. In fact most of my time with Mission Planner has been running on Ubuntu. I’ll include my notes on how to do that at the end.
Start Mission Planner.
You’ll see a map taking up most of the screen and a menu bar along the top of the screen.
In the upper, right corner you should see:
In the screenshot above, the connection settings are COM3 and and 115200. Those are the default settings for a serial port connection, and the screenshot is showing them because I was running MP without a radio and drone when I took that screenshot.
With WiFi, typically people use mavlink over UDP rather than TCP, and the default port is 14550. I’m not sure if the 14550 is from ArduPilot or from Mission Planner, though since Mission Planner seems to be under the ArduPilot project umbrella, it’s probably both.
After clicking “connect” you should see a popup saying that MP is fetching parameters; this is MP fetching the drone’s current configurations (which you can view and edit in the Config tab, see below).
NOTE: Do not have two or more drones on the same radio channel on at the same time, and try to connect. Mission Planner is not designed for that and will get confused about which drone is responding, and take forever to fetch parameters.
Along the top of Mission Planner are six or seven tabs. The ones we need to know about are:
Also, on the Data tab there’s a section with a subset of tabs:
Note: I don’t have a live copy of Mission Planner and a drone to experiment with as I’m writing these notes, so I’m not certain that I have all the Data Tab subtabs correct.
In this document I will always refer to the top level tabs with the word “tab” (Data tab, Plan tab, Setup tab, Config tab, etc). I will refer to the secondary tabs on the Data tab as “subtabs” (Quick subtab, Actions subtab, etc).
The Data tab and Plan tab are what we are mostly concerned with.
The Setup Tab and Config Tab are less important, but also simpler, so I’ll describe them briefly below, and then move on to Data tab and Plan tab.
Two important general principles when using MP:
The MP UI isn’t great.
Nothing happens with the drone until you send things to the drone.
Not to knock the Mission Planner devs, any software is a challenge to write and any GUI software especially so. That said, the following will likely trip you up if you’re not expecting them.
Often it seems like you do something, click a button, etc, and there’s no obvious indication that anything actually happened.
For example the Arm/Disarm button in the Data tab, Actions subtab.
If the drone is already armed and you click it, you get a popup asking you to confirm that you want to disarm the drone.
When the drone is disarmed and you click Arm/Disarm, you don’t get any popup or obvious indicator that something actually happens (the button might darken slightly, when I was testing with MP it was very bright out and hard to see if it did).
Often however, there is an indicator that’s visible but not obvious . “Armed” or “Disarmed” for example shows up in the Data tab “Horizon” box, which is a bit cluttered and hard to notice at first.
Note, this particularly comes into play in the Config tab, I’ll talk a little bit about that in the “Config Tab” section, below.
Some parts of the UI are dynamic, appearing and disappearing.
The Setup tab, for example, only has the “Mandatory Hardware” section when MP is connected to a drone. When it’s not connected, the section simply doesn’t show up at all, as far as I can tell.
Another aspect of how the UI isn’t great is that if the content of a tab subsection are too large to be displayed, a scroll bar will automatically appear. But generally you can’t drag the scrolling area, you have to use the arrows at the top/bottom or left/right ends of the scroll bar.
This is just part of how drones work, but again it can trip you up if you aren’t expecting it.
Most of the MP UI will not actually send anything to the drone until you click a button labeled something like, for example:
But the Data tab, Actions subtab has some buttons that are supposed to send messages to the drone as soon as you click them, with no need to click a “Write” button.
Also, what you send to the drone stays on the drone. DO NOT assume that when you send a plan, it clears out the old plan. There is a sequence of operations that I recommend you use when writing a plan. See the “Plan Tab” section, below.
The Setup tab is mostly relevant for doing compass and accelerometer calibration on the drone.
The Setup tab screen has two sections, a tree browser on the left listing subsections you can access, and the details of that subsection taking up most of the screen, on the right.
When MP is connected to a drone, a section will show up in Setup tab named “Mandatory Hardware”. Under “Mandatory Hardware” you can find the subsection for the acellerometer and compass. Unfortunately I don’t have a drone to test with at the time I’m writing these notes, so I can’t give you the exact name.
One thing to be aware of is that the “no obvious indicator” problem that I mentioned above seems (to me at least) particularly pronounced in the Config tab. I think this is just because of how long it takes for Mission Planner to transmit and/or receive the configuration to/from the drone. So be aware that when you click “Write”, it may seem like nothing happened for several seconds. Be patient and wait a bit to be sure, otherwise you’ll be in the middle of changing something and the config values will re-render and frustrate you.
The Config tab obviously plays a huge role in initially configuring your drone hardware, especially the flight controller. There’s a ton of information to talk about here, and I don’t know it because it’ll be specific to your drone and your flight controller.
After that initial hardware configuration:
The left side of the screen will have a list of configuration sections. The main one we are concerned with is “Basic Tuning”.
The right side of the screen will display the details of the configuration section.
Many of these configurations are loaded from the drone itself, unfortunately I don’t have a drone to test with at time of writing.
I found that one the most important setting for my purposes is in Basic Tuning, the first setting in Waypoints, “WP_speed”, defaults to a setting of 2.0 but I changed it to 1.0 and made the drone move at a more moderate speed, which made more sense for reasons specific to the drone I was working with.
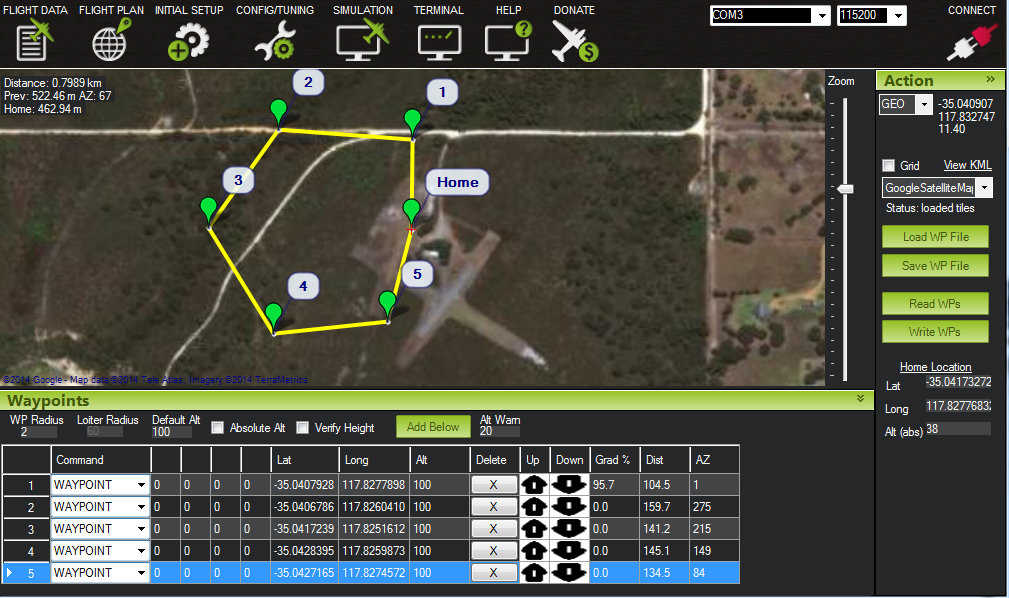
The Plan tab is the user interface for creating a plan, i.e. a sequence of waypoints that you want the drone to fly to.
Most of the screen will display a map.
The bottom of the screen will show a table of waypoints that have been created or loaded. Most importantly, the “Delete” column of the table will contain buttons to delete that waypoint from the list.
The right edge of the screen will have several buttons:
To set the drone home, right-click on a spot and in the right-click menu select “Set Home Here”.
Note: If using a tablet with a touch screen, long-press on the screen to get the right-click menu.
Click on a point on the map (or touch if using a touch screen) to set a waypoint there.
The waypoints are automatically numbered.
As you add each waypoint it is automatically added to the waypoints table below.
There is a line of numbers above the waypoints table. It is not obvious (another UI issue) but the numbers are editable. You can edit them and use them to manually add a waypoint using the “Add Below” button. Some of the numbers (like Waypoint Radius) will stay changed and be applied to waypoints that you create by clicking on the screen.
Note, you can resize the waypoints table area by clicking/pressing at the edge between the map and waypoints table and dragging it.
IMPORTANT: What you send to the drone stays on the drone, DO NOT assume that when you send a plan, it clears out the old plan. I recommend you use this sequence of operations when writing a plan to the drone:
BEFORE creating your plan or loading it from disk (you can create your plan, save it to disk, then do the following):
MP will popup a warning prompt that this will overwrite your current plan waypoints in the Plan tab. Click yes.
Create an empty plan by deleting the waypoints from the Plan tab using the delete button in the table of waypoints at the bottom of the Plan tab screen.
Click “Write” button to send the empty plan to the drone.
Click “Read” button again to see that the drone has an empty plan.
Create your plan or load your plan from disk.
Click “Write” button to send your plan to the drone.
Click “Read” button again to see and confirm that the drone now has your plan.
The Data tab has three sections of screen:
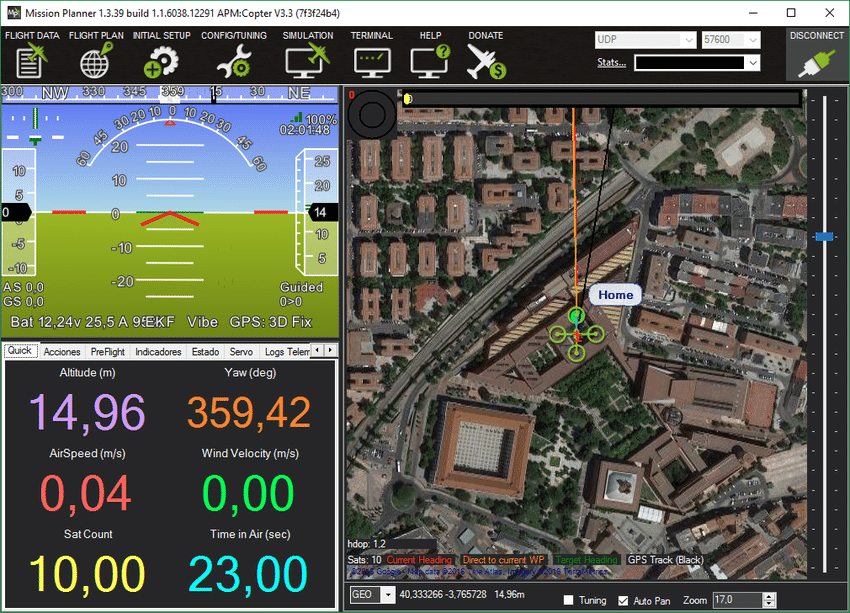
The subtabs are:
The Messages subtab can be useful to review what messages were sent when diagnosing problems.
The Status tab can bed useful for checking on various values when diagnosing problems.
The Actions subtab is what we’re mainly concerned with, it has buttons for actually doing things.

The first two columns are a set of dropdowns, and to the right of each dropdown, a button that sends the value defined by the dropdown.
Most important to us are the
first line: Do Action dropdown and button
third line: Set mode dropdown and button
Also useful is:
second line: Set WP dropdown and button
The Set WP dropdown and button enables you to choose specifically which waypoint in the plan to start/resume with.
The other buttons most relevant to us are:
Assuming you have already created a plan or loaded a plan from disk, and used the Plan tab “Write” button to send the plan to the drone (see Plan tab section for details on the recommended sequence):
In theory the Data Tab, Actions subtab Auto button should set the mode to auto and the drone should start executing the plan. In practice I found this did not seem to work reliably, and I have not yet figured out why (probably some order of operations issue).
What did work reliably was using the RC handset controls to switch the drone to auto (or from auto to manual and back to auto). (I had an RC handset as a fallback in case something went wrong with my drone programming).
TX16s Binding Examples: FrSky D16 and Spektrum DSM Receivers
Pixhawk Onboard Compass Calibration - Arduplane - Mission Planner
Planning a mission for your arducopter
Looks interesting, maybe a nice overview of the UI.
Some links I found on prefetching and caching maps
“solution: problem fixed. Just do MP–>Flight Plan–>MP Tool–>Prefetch by doing Alt+select area (while PC is connected to Internet). This will save the map in C:planner. Now take the same laptop/PC to selected area (where there is no internet). Open Laptop/MP and connect to Pixhawk via Mavlink. MP will automatically load gmapcache map once detected offline (no internet). NOTE: no action required after doing prefetch”
Mission Planner prefetch map functionality
This is based on the instructions at:
My notes below are slightly more friendly, but if there’s any disagreement between the information below and the sources I link to, obviously go with the sources.
The short version is that you need to:
mono MissionPlanner.exeFollow the link for installing Mono on Linux:
The instructions are for installing Mission Planner Ubuntu 20.4 LTS. I tried it on Ubuntu 24.04 LTS and it seems to have worked fine.
In summary, you’re:
Installing the tools to handle certificates and Gnu GPG.
puff@rockyraccoon:~$ sudo apt install ca-certificates gnupgInstalling the keys from the ubuntu key server.
puff@rockyraccoon:~$ sudo gpg --homedir /tmp --no-default-keyring --keyring /usr/share/keyrings/mono-official-archive-keyring.gpg --keyserver hkp://keyserver.ubuntu.com:80 --recv-keys 3FA7E0328081BFF6A14DA29AA6A19B38D3D831EFConfiguring apt to use the mono keys and the mono project repo.
puff@rockyraccoon:~$ echo "deb [signed-by=/usr/share/keyrings/mono-official-archive-keyring.gpg] https://download.mono-project.com/repo/ubuntu stable-focal main" | sudo tee /etc/apt/sources.list.d/mono-official-stable.listUpdating apt.
puff@rockyraccoon:~$ sudo apt updateInstalling one of the mono packages, in this example mono-complete
puff@rockyraccoon:~$ sudo apt install mono-completeClick the link at the ArduPilot page to download the Mission Planner zip file. If you’re feeling lazy, here’ the download link:
Mission Planner Latest Download
The zip file doesn’t have an enclosing directory, so make one:
puff@rockyraccoon:~/$ mkdir MissionPlanner
puff@rockyraccoon:~/$ mv MissionPlanner-latest.zip MissionPlanner/
puff@rockyraccoon:~/$ cd MissionPlanner/
Unzip the zip file:
puff@rockyraccoon:~/MissionPlanner$ unzip MissionPlanner-latest.zip
Archive:  MissionPlanner-latest.zip
  inflating: 7zip.dll
  inflating: zh-tw/MissionPlanner.resources.dll

  [...1413 lines later...]

  inflating: zh-tw/ZedGraph.resources.dll
  inflating: zlib.net.dll
puff@rockyraccoon:~/MissionPlanner$ It’s not hard to remember how to start Mission Planner, but let’s make it even easier:
puff@rockyraccoon:~/MissionPlanner$ touch start_mission_planner.sh
puff@rockyraccoon:~/MissionPlanner$ echo "mono MissionPlanner.exe" >> start_mission_planner.sh
puff@rockyraccoon:~/MissionPlanner$
I’m not going to bother chmodding, or adding a “#!/bin/bash” line. For now I’ll just do “bash start_mission_planner.sh”
Just do:
puff@rockyraccoon:~/MissionPlanner$ bash start_mission_planner.sh